Reviewing content is a tedious task. Especially if the review process is complex and too messy. A company posts multiple content regularly, it is not a one-time process. Therefore developing a simple, and easy-to-use content approval system is important, and we have done it for you. With the Content Approval Workflow plugin, you can easily manage the content with timely reviews.
It also bridges the gap between the approval requester and approval giver by giving them constant notification about approvals, also there is an option to provide feedback and many other features that make this plugin a must-try.
Let’s take a look at how to install the plugin.
Quick Summary:
- Streamline WordPress content reviews with the plugin.
- Easily install the Content Approval Workflow plugin.
- Set up strict approvals and ask designated reviewers.
- View feedback and track all content approval history.
Table of Contents
How to install the Content Approval Workflow plugin?
The installation of the plugin is simple and easy. It can be done in three steps mentioned below.
Navigate to your WordPress Dashboard and follow these steps:
- Click on “Plugins” in the left-hand menu.
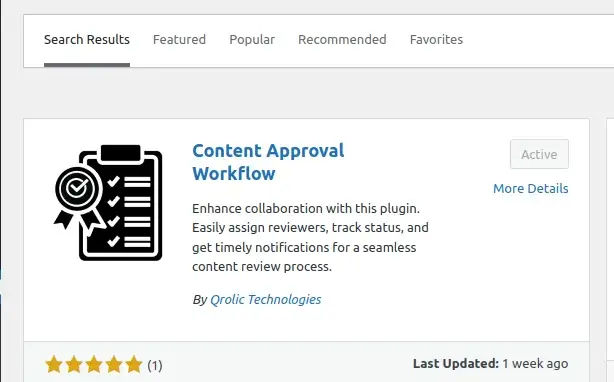
- Select “Add New” and search for “Content Approval Workflow”.

- Install and activate the plugin.
Once the plugin is installed and activated it is important to understand how to streamline the review process.
Let’s understand it.
Once the plugin is installed and activated it is important to understand how to streamline the review process.
Let’s understand it.
How to streamline the review process in WordPress?
Streamlining the review process in WordPress with the Content Approval Workflow Plugin is a straightforward and efficient task.
Follow these steps to enhance your content review :
- Set up Content Approval Workflow
- Self-Assessment of content
- Ask for a review
- Review the approver’s feedback
- Explore the history of approved content
Set up Content Approval Workflow:
- You can control and manage the content by installing the “Content Approval Workflow” plugin.
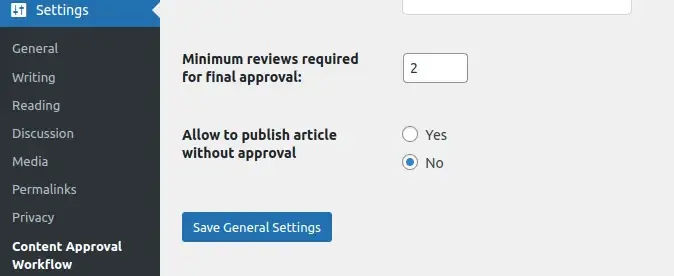
- Add strict mode on content publishing.
- – Go to “Settings” and select “Content Approval Workflow”.
- – In the “General” tab, set the minimum number of reviews required for final approval.
- – Choose “No” in the “Allow to publish article without approval” option.
- – Save the settings.

Self-Assessment of Content:
- Do a thorough review of the content to ensure quality, accuracy, and alignment of it.
- After self-assessment, you can submit the content for review/approval.
Ask for a review:
After submitting the content, one can ask for review/approval from the designated authorities.
Follow the steps for how to ask for a review.
- Go to the content you want to set reviewers for and find the “Content Approval Metabox”.
- Inside the “Content Approval Metabox” meta box, find the “ask approval” box.
- Here, you will see a list of multiple users. Select the users from whom approval is required by checking the box beside their names.
- After selecting the reviewers, click the “Ask For Review” button. As soon as you click to seek review, immediately a mail as a notification will be sent to the selected users, informing them that the post is ready for their review.
Review the approver’s feedback.
After requesting approval, check if there’s any feedback from the approver for the same. Meanwhile, if you are wondering How to give feedback to content writers in WordPress, check our blog.
To view the feedback in the Content Approval Workflow meta box, follow these steps:
- Navigate to the desired content in WordPress.
- Locate the “Content Approval Workflow” meta box in the post editor.
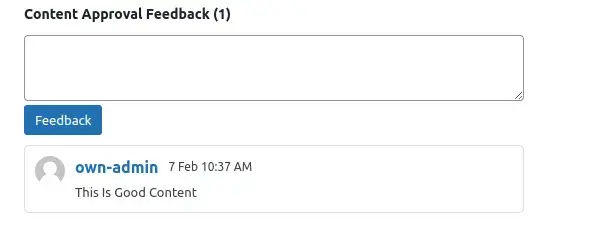
- Inside the meta box, find the “Content Approval Feedback” section.
- View the feedback provided by the approver, as shown in the image below.

If there’s any feedback, carefully read the feedback provided by the approver. Make required changes to the content as guided in the feedback.
Explore the history of approved content.
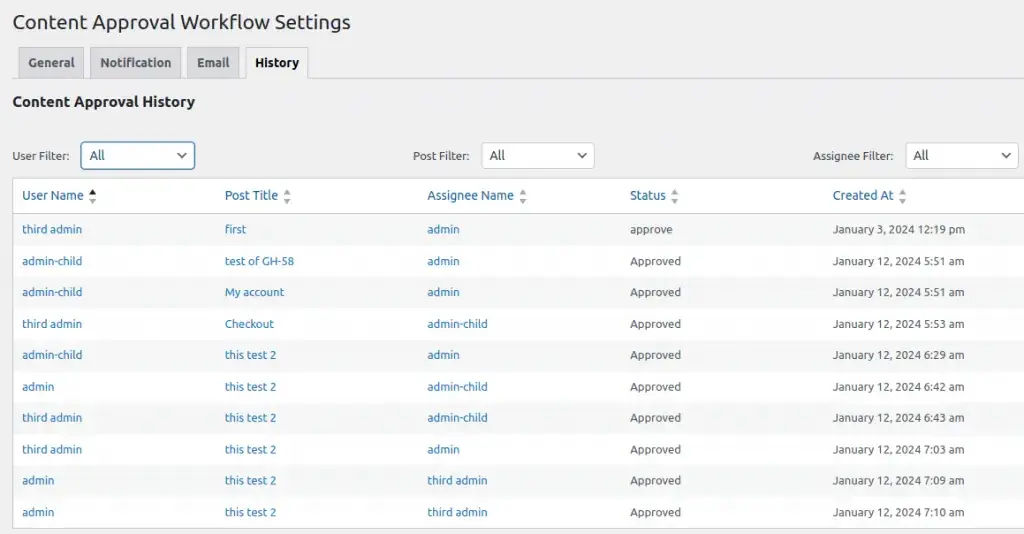
After completing the approval process, you can access the history of approved content containing details such as user names, post names, assignee names, and approval dates.
Follow these steps to view the history:
- Go to the settings tab and select “Content Approval Workflow”.
- Within the plugin settings, click on the “History” tab to view all approved content history.

If you want specific content history:
- Navigate to the desired content and locate the “Content Approval Workflow” metabox.
- Inside the metabox, find the “content approval history Table” to view detailed information about the approval history for that specific content.
By following the outlined steps, you can achieve significant improvements in your content review process. The plugin facilitates a comprehensive review with multiple reviewers, automated notifications for faster approvals, clear communication with revision history, and a sense of ownership among reviewers – all leading to the publication of exceptional content for your WordPress site.


